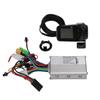
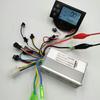
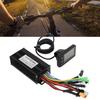
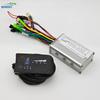
</dada-widget:video>
Suitable for electric bicycles and scooters.
Specifications:
Material: Plastic + LCD + Metal
Color: As shown in the picture
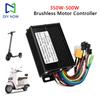
Power: 350W/500W
Waterproof: Rainproof
Controller size: Approx. 9x 5x 3 cm
Display size: Approx. 6 x 4 cm
Weight: Approx. 332 grams
Packing list:
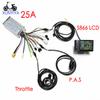
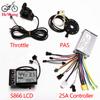
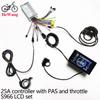
1 x LCD display
1 x controllerpecifications: 350W , 24V/36V/48V
Material: Aluminum Alloy
Operating Voltage: 24V/36V/48V
Rated Power: 350W
Current: 20-25A
Case Dimensions: 9*5*3cm
MOSFET: HY3208 6mosfot
Functions: Headlight Power Supply, Throttle, protocol 2 instrumentation (5pin display), 6-pin Hall Effect sensor, dual low-pressure brake (E-brake), power assist (PAS), self-study
3. Communication Protocol: UART
Full Display Content (Displays all content within 1 second of power-on)
Display Content Introduction
3.1 Voltage Status Level POWER
3.2 Multifunctional Display Area
Single Mileage DIS, Total Mileage ODO (Units: mp, km)
3.3 Speed Display Area
Units: mp/h, km/h
Speed signal is taken from the Hall effect signal inside the motor, sent to the instrument panel via the controller (time of a single Hall effect cycle, unit: 1ms). The instrument panel calculates the actual speed based on wheel diameter and signal data (motor Hall effect also requires setting the number of magnets).
3.4 Vehicle Main Gear Adjustment, adjustable from 0-3 and 0-5 gears;
3.5 Vehicle Status Display Area
Setting Mode
: Digital Voltage
: Brake Indication
: Motor Fault
: Throttle Fault
: Wheel Diameter
: Headlight
: Controller Fault
Note: Error code E06 occurs, the product defaults to 36V, this is an undervoltage situation, you can manually adjust the meter to adapt to 24V, or check the battery and adjust it to 24V and wait for about 10 seconds. Do not touch anything during this period. It will convert automatically.
Note: If error code E07 occurs, the power assist PAS cable (red, yellow, black) and the throttle cable (red, green, black) are connected incorrectly. Follow the wiring video link, or rewire the throttle cable and adjust the throttle cable (red, green, black) signal line. Reference videos
Note: If error code E10 occurs, it indicates a loose connection at the instrument panel connector. Try unplugging and replugging the cable. Refer to the video website
4. Settings
P01: Backlight Brightness, Level 1 is dimmest, Level 3 is brightest;
P02: Speed Unit, 0: km/h; 1: mp/h;
P03: Voltage Level: 24V, 36V, 48V, default 36V;
P04: Sleep Time: 0, no sleep; other numbers are sleep time, range: 1-60; unit: minutes;
P05: Assist Levels: 0-3 mode, 0-5 mode;
P06: Wheel Diameter: unit: inch; precision: 0.1;
P07: Speed Measuring Magnet Count: Range: 1-255;
P08: Speed Limit: Range 0-100km/h, 100 indicates no speed limit;
1. Communication Status (Controller Control): Drive speed maintained at the set value,
Error: ±1km/h; (both power assist and throttle speed limit)
Note: The values here are based on kilometers. When the unit setting is changed from kilometers to miles, the speed value on the display interface will automatically convert to the correct miles value. However, the speed limit value set in this menu under the miles interface will not be converted and will be inconsistent with the actual displayed miles speed limit value;
P09: Zero Start/Non-Zero Start Setting, 0: Zero Start; 1: Non-Zero Start;
P10: Drive Mode Setting, 0: Power Assist Drive (the amount of power assistance is determined by the power assist gear; the throttle is ineffective in this mode).
1: Electric Drive (driven by the throttle; the power assist gear is ineffective in this mode).
2: Power Assist Drive and Electric Drive Coexist (electric drive is ineffective in zero start state).
P11: Assist Sensitivity Setting 1-24
P12: Assist Start Intensity Setting 0-5
P13: Assist Magnet Type Setting: 5, 8, or 12 magnets
P14: Controller Current Limit Setting: Default 12A, Range: 1-20A
P15: Controller Undervoltage Value
P16: Cruise Control Options: 0: Cruise Control Off, 1: Cruise Control On
P17: ODO Reset Setting: Press and hold the up button for 5 seconds to reset ODO.IV. Button Introduction
1. In the off state, press and hold the power button to turn on; after powering on, briefly press the power button to switch the interface between ODO, DIS, and VOL.
2. In the on state, press and hold the power button to turn off; press and hold the up button to turn on the headlights; press and hold the down button to enter 6KM cruise control; briefly press the up button to increase the power assist level by 1; briefly press the down button to decrease the power assist level by 1.
3. Press and hold the up button + down button to enter mode settings.
Parameter value modification: In a certain parameter state, briefly press the power button to switch parameters; briefly press the up button to increase the value; briefly press the down button to decrease the value. After modification, briefly press the power button to switch to the next parameter and save the previous parameter value; after parameter modification, press and hold the up button + down button again to exit the settings interface. If you do not press, wait 10 seconds for automatic exit and parameter saving.
Table: Standard Connector Wiring Sequence Table
Standard Wiring Sequence | Standard Wire Color | Function
1 Red (VCC) | Instrument power cable
2 Blue (DS) | Controller power control cable
3 Black (GND) | Instrument ground
4 Green (RX) | Instrument data receive cable
5 Yellow (TX) | Instrument data transmit cable
6 Brown (DD) | Instrument headlight cable
7 White (GND) | Headlight ground cable
Q1. What voltages does this controller support?
A: This controller supports 24V, 36V, 48V batteries.
Q2. Is my motor a brushless motor? How can I tell?
A: This controller is for brushless motors. Brushless motors are 3-phase wires + 5/6 Hall wires.
Q3. The LCD displays an E06 error code after I install it, what is the problem?
A: This is a battery undervoltage code, check if the battery is full and also please set your voltage in P03 in the LCD settings.
Q4. The LCD shows E07 error code after my installation, what is the problem?
A: This is a motor fault code, please check if the hall sensor and phase wire are connected correctly. And drive the motor with 4-5 high speed, E07 will disappear.
Q5. My brushless motor only has 3-phase wires, can I use this LCD kit?
A: We do not recommend LCD kit, but Hall will show E07 error code. We recommend our S810 LED panel kit, you can search in our shop.
Q6. My motor reverses, what do I do?
A: Please plug in the learning wire (auto-detect) to check your motor parameters for normal drive and compatibility, disconnect and plug in again to change the motor drive direction.
Q7.My electric PAS power pedal is not working.
A:
Method 1: The diameter of the wheel with the magnet is too small, or the magnet is not aligned with the sensor. Replace it with a 12-magnet sensor.
Method 2: The PAS sensor connector is loose. Try unplugging and replugging it, or change the wiring sequence.
Q8. Can the product be used without a separate instrument panel?
A: The product has a 5-pin instrument panel cable. Shorting the red and blue wires will start the device. Red is the positive power terminal, and blue is the ignition lock wire.
Indicator Panel: LED
Choice: yes
Brand Name: NONE
High-concerned chemical: none
Origin: Mainland China
Type: Controller


 Ingen leveringsrefusion